
I was expecting my first baby in 2016. At that time, I already had a tailor’s degree and had sewn all sorts of things, but children’s clothes, especially baby clothes, were still quite uncharted territory for me. I had also sewn some knitwear products, but always for women – blouses, dresses, skirts.
The truth is, back then, the selection of fabrics was not as vast, diverse, and colorful as it is today. Most children’s clothes were sewn from knit fabrics, and the selection of these in regular fabric stores was pretty poor – not to mention the lack of GOTS or Oeko-Tex certifications. At the time, RiiMeTex had just entered the market, and they were a great lifeline, providing high-quality merino interlock and good dress or knit fabrics.
Now, the fabric selection has become so colorful that a beginner sewer might find it quite difficult to navigate. What to make from what fabric, and what should be kept in mind? There’s a lot of choice, but most of it is available in online stores. Fortunately, some online shops also have physical stores or studio spaces where you can ask for advice and feel the fabrics in person. If you’re more interested in the fabric topic, it’s also covered in the “Sewing Children’s Clothes” online course.
I thought I would gather some of my own preferences when it comes to fabrics, patterns, and tools here.
Why did I decide to sew baby clothes?
Honestly? One of the biggest reasons for me is the price of clothing. My brain automatically calculates the fabric cost and sewing time, then compares it to the price of the item in the store (from a 40-50 cm x 150 cm piece of fabric, I can make 2-3 pairs of baby trousers, and it takes about 1 hour of sewing). I also get to choose better fabrics and make the clothing with extra room for growth, taking into account the baby’s measurements (because, let’s face it, babies aren’t exactly standard-sized).
Additionally, I can sew the required clothing in the right size exactly when it’s needed. For example, if it’s not going to be very cold this winter, I can skip sewing a wool fleece hat and use the fabric for another item or save it for the next season to make the right-sized product.
Equally important are the questions you ask. They encourage me to continually improve, learn new things, experiment, and sew even items that I initially wouldn’t have considered. This way, I can also provide better answers to your questions.
What should you keep in mind when sewing baby clothes?
First and foremost, fabric choice – I always prefer natural fabrics over polyester. Polyester doesn’t breathe and can make babies sweat, causing discomfort. Babies can’t tell you, “Hey, I’m too hot!” So, you won’t find fleece, minky fleece, or polyester knit in my shopping cart. Well, in kindergarten, kids wear fleece jackets, and softshell pants are made of polyester for daycare as this is practical and the kid can tell if he/she feels hot or cold.
On the other hand, I prefer fabrics with an Oeko-Tex certification. This means the fabric should be free from harmful substances. If you see a brightly colored fabric in the store without that certification, it might just be a chemical bomb in disguise. Oeko-Tex provides reassurance that the fabric is suitable for sewing children’s clothes, and it’s always a good idea to wash the fabric before sewing it or, at the very least, before putting it on your baby.
Be cautious with ribbons, lace, and bows. Also, make sure to hide any thread ends so that fingers and toes don’t get caught. Actually, this is something you should do for any garment, but I wanted to highlight it just in case, because you should also check store-bought clothes for this.
For newborns, remember that they are still in a fetal position. For example, tops with front zippers or clothing where something gathers under the chin might cause discomfort. You should also consider how skilled you are at dressing a baby – do you prefer bodysuits, or can you manage pulling clothes over their head?
If you want, for the smallest sizes, you can leave the seam allowances to the right or sew with a 3-thread overlock stitch and use thicker threads in the looper.
Which garments should you start with?
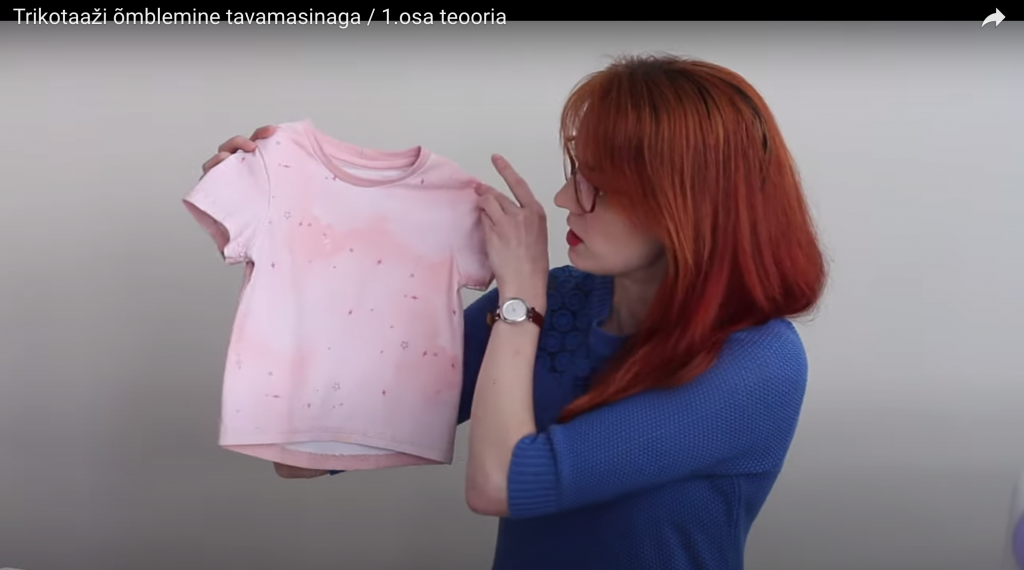
Since most children’s clothes are sewn from knit fabrics, it’s good to familiarize yourself with the basics of sewing knits. You can do this by watching this video.
If you want to refresh your memory on how to use a sewing machine, I’ve also made a small overview, which you can view HERE.
I’ve divided the different garments into five levels based on my own intuition. Of course, each item can be sewn in simpler or more complex ways, but I tend to focus on the simplest version 🙂
Now, let’s get to the sewing part. The easiest items to sew are hats and trousers/pants.
Level I – Hats
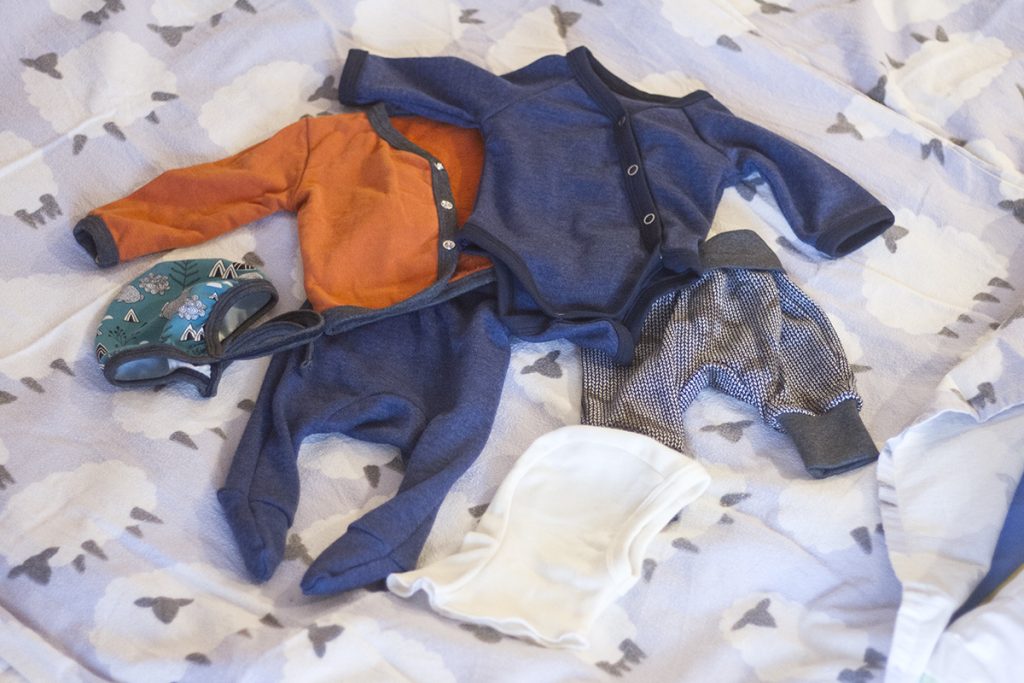
My babies were born in the fall and winter. Therefore, my absolute favorite hat has been a merino interlock Balaclava hat. Merino interlock is generally soft, doesn’t itch, stretches well, and is easy to put on a newborn’s head. It also grows with the child as their head grows (so it can be worn for a longer time).
The pattern for this hat is available for free on the Ottobre website.
For colder weather, you can make the balaclava hat out of wool fleece.
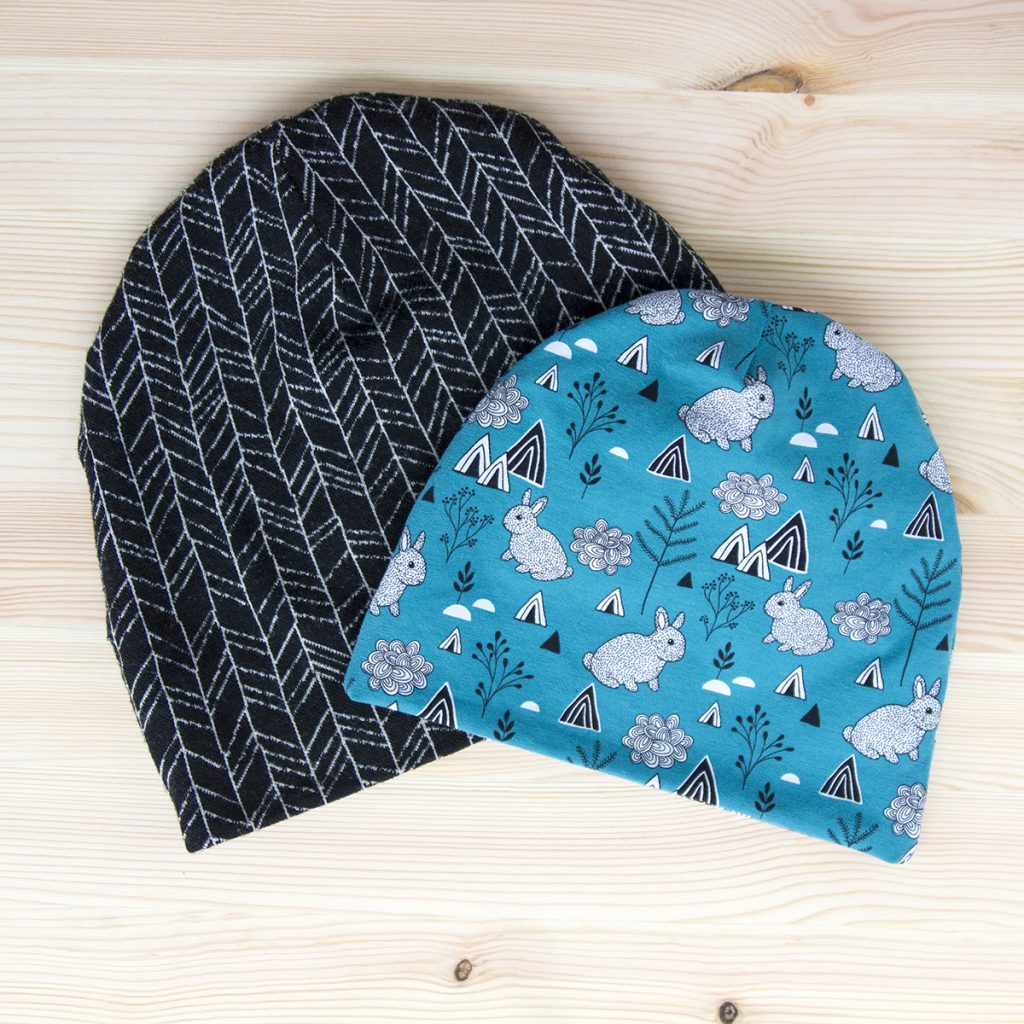
Another classic hat is the beanie, a typical knit hat. I usually make them from double-layered knit fabric (around 200g/m2). You can see how I sew it in my YouTube video.
You can find the pattern HERE.
For a summer version, you can make the hat from a single layer of fabric, but you’ll need to finish the edges with a twin needle, zigzag stitch, or an overlock machine stitch.
You can also sew scarves with snaps to go along with the hats. It’s a great way to use up fabric scraps! For example, I had some leftover “Moomin” fabric, and on the other side, I used three layers of muslin fabric.
If you want to try something a bit more exciting, my children’s favorite is a knit hat with a brim.
For winter wear, it’s a good idea to make a merino interlock neck warmer. It keeps the neck nice and warm, and merino interlock is so soft and stretchy that it’s comfortable to put around the child’s neck. You can see how to sew a neck warmer here!

Level I – Pants and Leggings
It’s also quite simple to sew pants/leggings. For a summer baby, soft muslin (a cotton, soft, muslin-like fabric) pants work really well. Medium-thick leggings/pants can be made from regular knit fabric or French terry (FT) fabric. For thicker pants/warm underwear, you can use merino jacquard, merino interlock, or brushed sweatshirt fabric. When using brushed sweatshirt fabric, it’s important to check whether the brushed soft and fluffy side is cotton or polyester (you can see this by checking the fabric composition).
You can also achieve a great result with soft velvet or waffle-weave cotton knit fabric. Every year, new types of knit fabrics are introduced, so it’s worth keeping an eye on them and experimenting.

Pants Patterns
Most of the patterns I use are ones I’ve designed myself. However, since readers can’t take my pattern-filled binder out of their drawers, I try to offer alternatives.
The leggings pattern from baby sizes onwards is also published in the Käsitöö magazine, August 2019 issue (it also includes other children’s clothing patterns, which you can find at the library or borrow from a friend).
Ottobre patterns are also quite popular, but they tend to be more suitable for plumper children (with some exceptions). Therefore, it’s worth measuring the pattern from Ottobre against your child’s measurements before you start. If the pattern is significantly larger, you can save time and frustration by either adjusting the size or, if possible, opting for a smaller size (with baby clothes, this often means the smallest size might still match a larger ready-to-wear size, like size 68 instead of 56).
You can also find patterns in Burda magazines, and once a year, Burda Kids is published, which is a collection of children’s patterns released throughout the year. In my opinion, Burda children’s patterns are a better fit size-wise, but many have complained that the sleeves and legs tend to be shorter. Always check the pattern against the measurements!
Burdas can also be found in libraries or downloaded from the BurdaStyle website. There are also many small producers who have released their own patterns. It’s important to read the feedback on these patterns to make sure the fit is good.
For simple, baggy pants (which are fairly easy to sew), you can draw the pattern on paper and keep making more and more. However, this might feel difficult for a beginner. Luckily, the fabric requirements aren’t huge (so if something goes wrong, it’s not too costly), and practical skills are mostly learned through experience 🙂
A great beginner project would be size 68 short knit pants.
Level II – T-shirts, Tunics, and Simple Dresses
Once you’ve mastered making hats and pants, the next step could be these items. I grouped these three together because they are relatively simple to sew, though of course, they can also be made quite complex and detailed.
I typically sew T-shirts from about 200g/m2 cotton knit fabric. A very nice material is bamboo-blend knit fabric, and for more unique results, you can use special weave cotton knits (e.g., waffle-knit cotton). Merino wool is also a great option for winter.
For tunics and dresses, I’ve used cotton jacquard fabric – a warmer and thicker variant, and a nice change from regular printed fabrics (jacquard is a woven pattern fabric).
You can see an overview of making a quick dress on my Instagram HERE.
To see how to sew a neckline binding with a regular sewing machine, you can check out the tutorial HERE.

T-shirt Patterns
One option for T-shirt patterns can be found in the Käsitöö magazine, August 2019 issue. If you don’t have it on hand, you can try a PDF pattern – one free version is HERE. This is a simpler and looser version suitable for beginners, with all the pattern edges (including the neckline and hems) finished with ribbing.
If you’re looking for a more professional result and want to explore various details, you can do that through my “Sewing Children’s and Baby Clothes” online course. For this course, I also digitized the T-shirt patterns, which are included with the course (sizes 56-122). In this course, I demonstrate different methods for sewing a T-shirt (which can also be applied to other knit garments) and use various machines (you can sew using just a regular sewing machine, but you will also see how to use an overlocker and coverstitch machine).

III Level – Sweatshirt
It’s important to point out that making a sweatshirt is almost as easy as sewing a T-shirt. The main difference is that the fabric is a bit thicker (sweatshirt fabric) and the pattern is looser. Things get a bit more complicated when you want to make a zip-up sweatshirt. However, I must admit that sewing in a zipper is not as scary as it may seem at first. Why? Because although sweatshirt fabric is knit and stretches, the zipper itself does not stretch and remains stable. Additionally, to make your work easier, it’s important to use enough alignment marks. If you still struggle with sewing in a zipper or if the sweatshirt fabric is too stretchy, you might find a few tips HERE.
There are primarily two types of sweatshirt fabrics:
- Loopback fabric (also known as French Terry or FT)
- Brushed sweatshirt fabric.
You can also successfully sew sweatshirts from jacquard fabrics (whether cotton or merino). Sweatshirt fabrics containing modal are very soft, flexible, and stretch better than regular cotton ones.
Make sure to choose a good quality zipper—especially during the period when your child is learning to zip up their clothes on their own. Opti and YKK zippers are highly recommended.

Sweatshirt Patterns
Once again, you’ll find a pattern for a zip-up dragon sweatshirt in the Käsitöö magazine. There’s also a PDF pattern for a hooded raglan sweatshirt in a large size range.
IV Level – Unlined Jumpsuits
Once you’re comfortable sewing zippers, making an unlined jumpsuit isn’t a big challenge. However, finding the right pattern might be a bit tricky. The most commonly used jumpsuit patterns are likely from Ottobre and various small pattern makers (e.g., Jujuna). When choosing a jumpsuit pattern, it’s essential to pay attention to the material it’s designed for. Is the pattern meant for sweatshirt fabric/knit (for indoors or outdoors), or is it made for softshell or a looser outdoor jumpsuit?
As always, it’s a good idea to measure the pattern before you start sewing and compare these measurements to an existing jumpsuit. This makes it easier to determine if the pattern fits well, especially if you’re working with some basic sewing experience.
For easy diaper changes, it’s smart to add two zippers to the jumpsuit. This makes life much easier! If needed, you can open the zipper from the bottom, or to take the whole suit off, you can open it like a regular zipper.
V Level – Bodysuits and Lined Jumpsuits
I’ve grouped two very different garments for the fifth level, and this opinion is based on my personal experience.
Sewing a lined jumpsuit for the first time can be a bit confusing if you don’t have a detailed step-by-step tutorial. The complexity also depends on the materials you choose. For instance, if you want to make a merino-lined jumpsuit and you’ve chosen incredibly soft merino interlock as the lining, you might need to cut the lining pieces a bit smaller than the outer fabric pieces. Merino interlock is very stretchy, so it’s important to account for that when you’re putting your jumpsuit together.


Bodysuits
There are many different types of bodysuits to choose from. Boat-neck bodysuits are probably a bit easier to sew compared to other variations. However, attaching the curved hem and installing the snaps often causes trouble for many people. When applying the binding, it’s important that the binding is slightly shorter than the edge you’re binding (usually based on feel and adjusted as you go under the sewing machine). This technique ensures that the fabric edges are neatly finished and have a clean, professional look.

Start with Simpler Binding Techniques
Initially, it might be easier to use a strip of the main fabric (about 3.5-4 cm wide) folded in half instead of classic binding. This simplifies the process, especially for beginners. It’s highly recommended to do test samples and practice first! In my teaching experience, I’ve seen some people get it right immediately, while others need a bit more practice to “warm up.” Additionally, materials vary widely, and developing the feel for them takes time.
Wrap Bodysuits
For newborns, my favorite is the wrap bodysuit. When my second child arrived, I experimented with different patterns, seeking a balance between quick sewing and comfortable use. I have to admit, the best pattern I’ve found so far is the Hallonsmula pattern. I also made several variations of my own bodysuit patterns, but they were still more troublesome to sew than the Hallonsmula version. This pattern’s sizing and proportions fit my preference perfectly (for instance, I don’t use Ottobre’s bodysuit patterns, as they tend to be way too big, although they might work well for a chubbier baby).
Snaps
Snaps are another important consideration when making bodysuits. For home use, I strongly recommend Prym products, as they offer both plastic and metal snaps (including tricot snaps, also known as ring snaps). There are different dies for installing various types of snaps. For those just starting out, Prym also offers small hammer-install kits if you don’t want to invest in a snap setter just yet.

Investing in a Snap Press for Larger Projects
When you move on to more extensive snap installations and have the space for it, investing in a snap press can be a great decision. Snap presses come with different dies that allow you to install various types of metal snaps. I personally use Prym pliers for installing eyelets, but I rely on the snap press for applying regular snaps.
Consider Sewable Snaps for Safety
You can also opt for sewable snaps (which are often safer), especially if you’re worried about improperly installed snaps. Sewable snaps eliminate the risk of the snap malfunctioning. However, be mindful that sewing snaps onto the fabric might cause the fabric around the snap to tear more easily. If you choose to use regular sewn-on snaps, it’s advisable to reinforce the fabric by adding a stabilizing fabric under the snap on the inside of the garment. This can prevent the fabric from tearing over time.

Note! The most common brands are Prym and Koh’i’Noor. Their snaps and dies are not interchangeable. Prym snaps are 9.5mm, while Koh’i’Noor snaps are 9.7mm.
I hope this has helped clarify what you can sew and perhaps given you some pattern hints. If you start with simpler products and gradually move forward on your sewing journey step by step, I believe you’ll soon be addicted to sewing and enjoy the creative freedom and playfulness that sewing for children offers. 🙂
Happy sewing!
Ruth


